Linear Pull Calipers
Linear pull calipers are a rim style braking system, which requires periodic maintenance in order to function properly. There are primarily 4 areas that should be checked and adjusted on a linear pull brake system, and they are:
1) Caliper arm adjustment
2) Brake pad alignment
3) Centering caliper arms
4) Adjust brake pad to rim gap
Before attempting to adjust linear pull brakes, the wheels should be attached properly, centered evenly between the forks or chain/seat stays, and the rims should be true. When refering to the foward part of the brake pad means the end of the pad that points in the direction of tire rotation when the bicycle is moving forward.
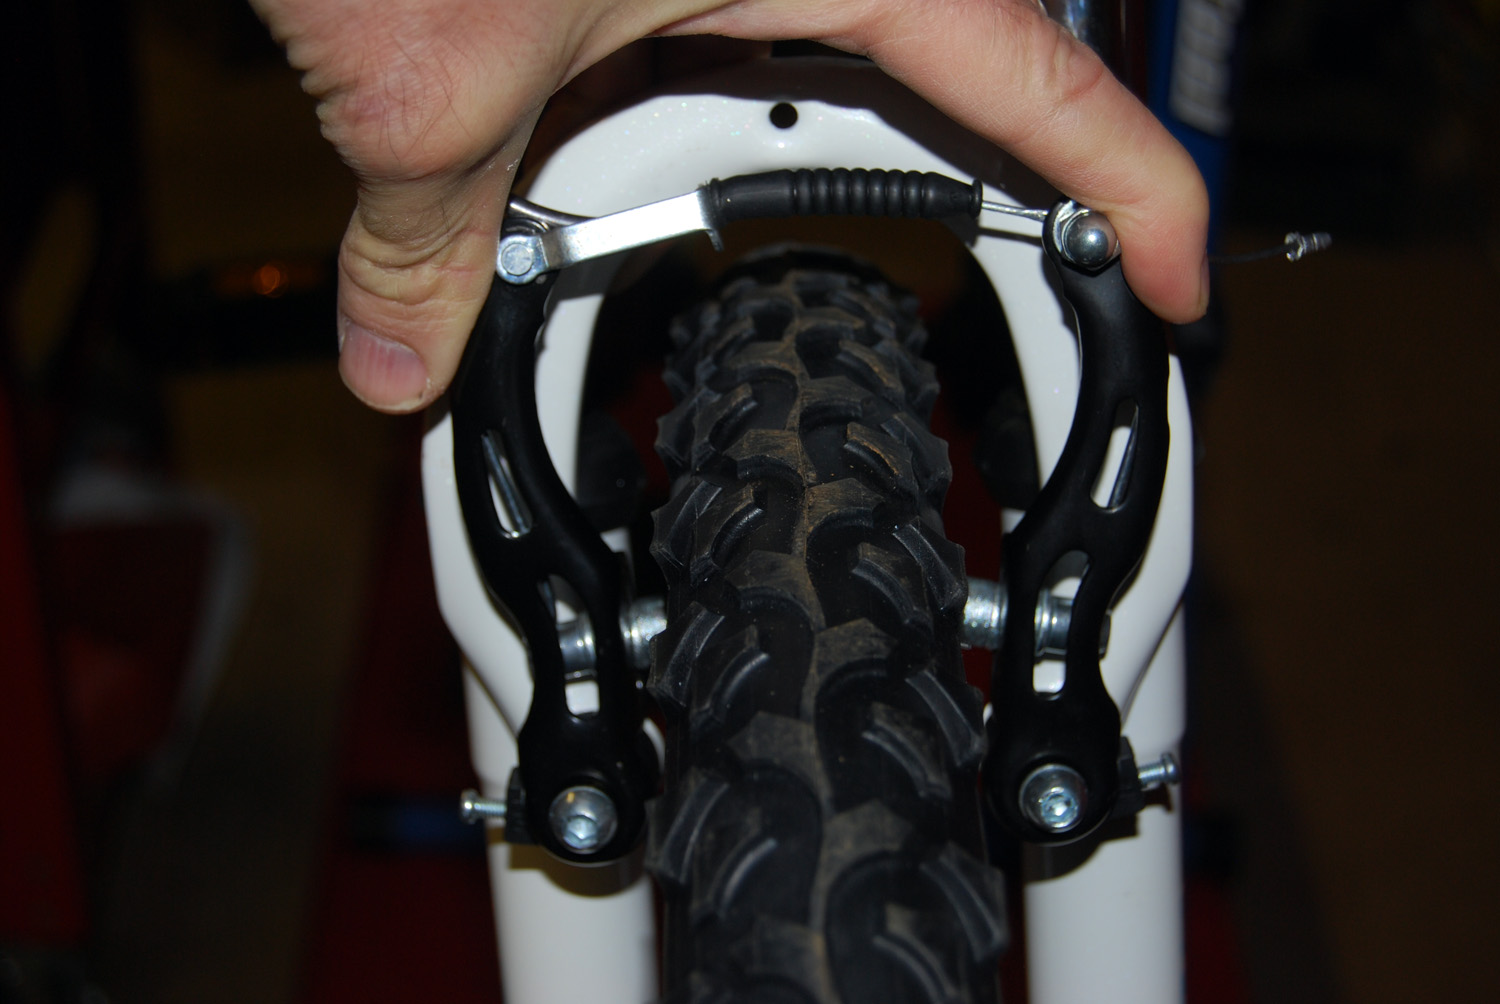
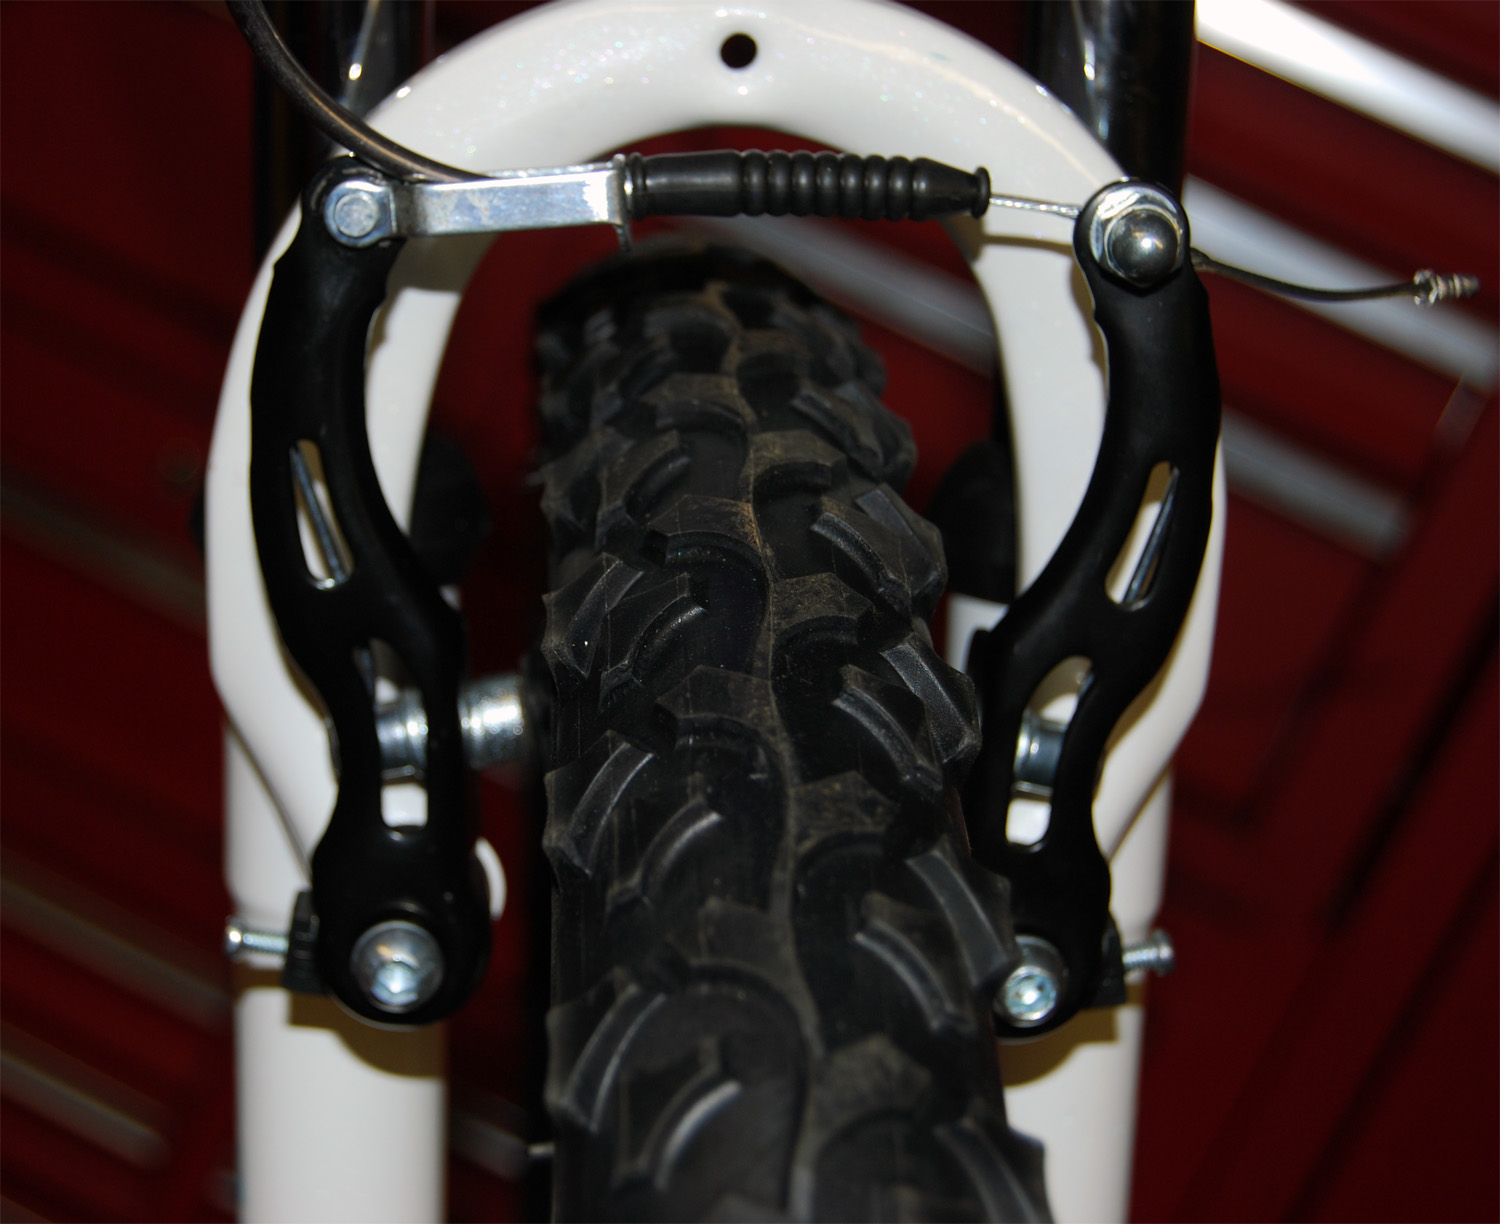
Manually press calipers together and check to see if caliper arms are close to parallel
Caliper arm adjustment is checked by manually pressing the calipers together until the brake pads are touching the rim, than view the calipers to see how close they are to being parallel with one another. The objective of this adjustment is to get he calipers as parallel as possible without decreasing the distance between the cable noodle bracket and pinch bolt so that it is less than 39 mm. If caliper arm adjustment is necessary, there are convex and concave washers of varying thickness used to secure the brake pad to the caliper arm, and these washers can be swapped around to change the distance the brake pad is from the caliper when it is secured to the arm. This will change how close or far apart the calper arms are to one another when the arms and pad are pressed against the rim. There are 2 convex washers and 2 concave washers. A pair of each is on each side of the caliper arm when the brake pad is securely attached to the arm.
Brake pad alignment involves 4 different types of alignments with 1 being optional. The procedure for each alignment is to loosen the nut securing the brake pad to the caliper arm, than adjusted the position of the brake pad until all 3 or 4 alignments are performed, than tightening the brake pad to the caliper arm. These alignments are:
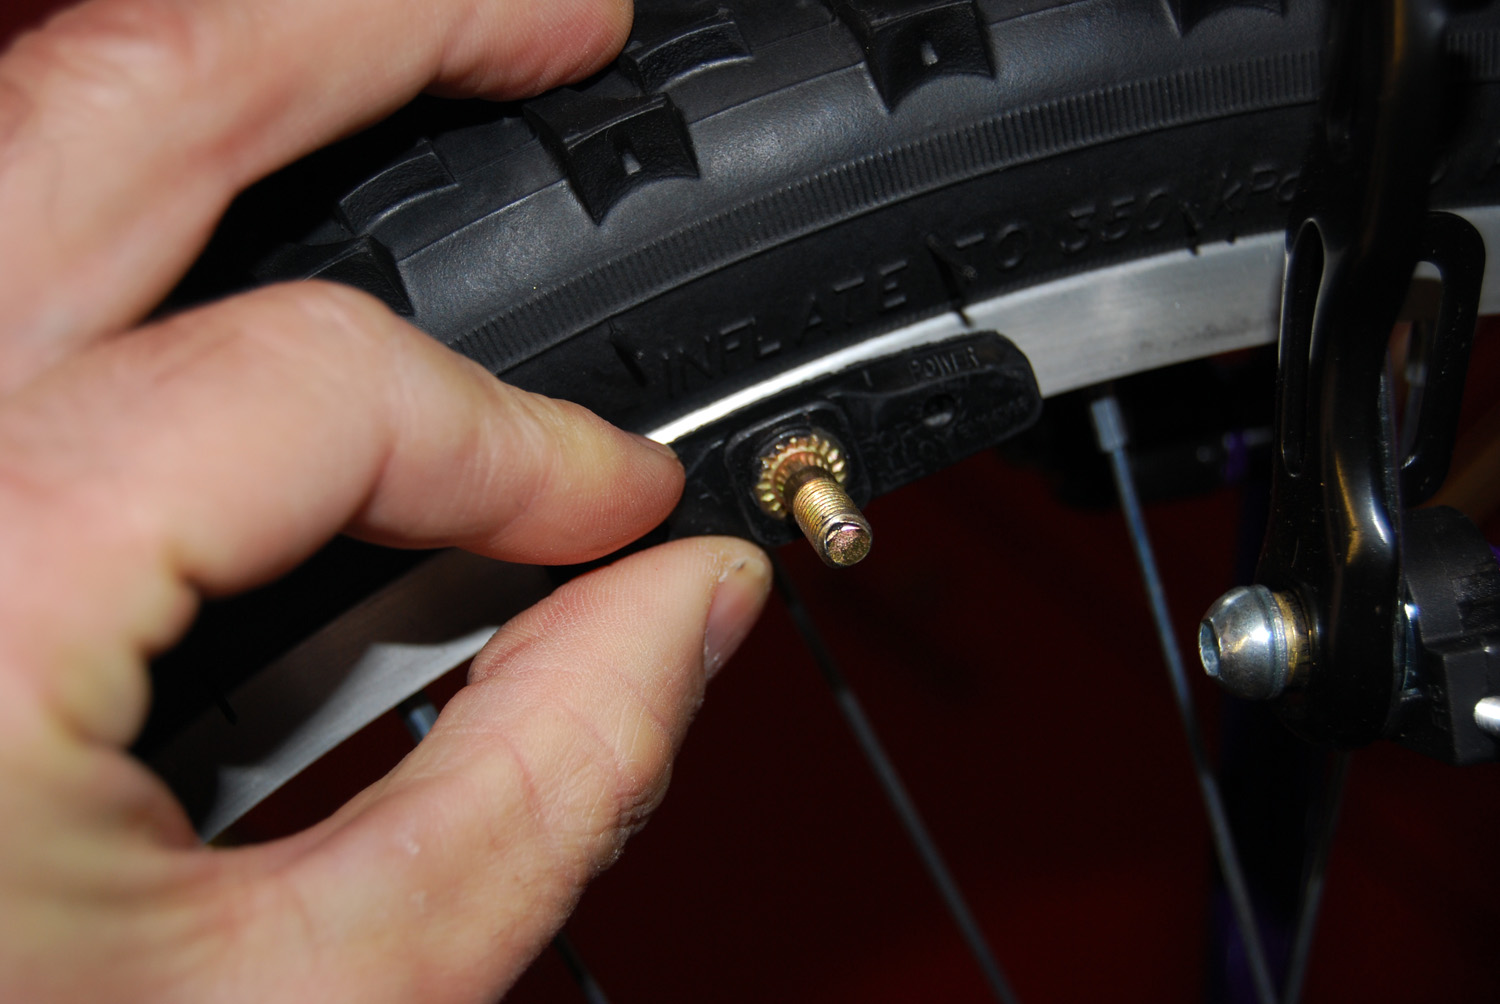
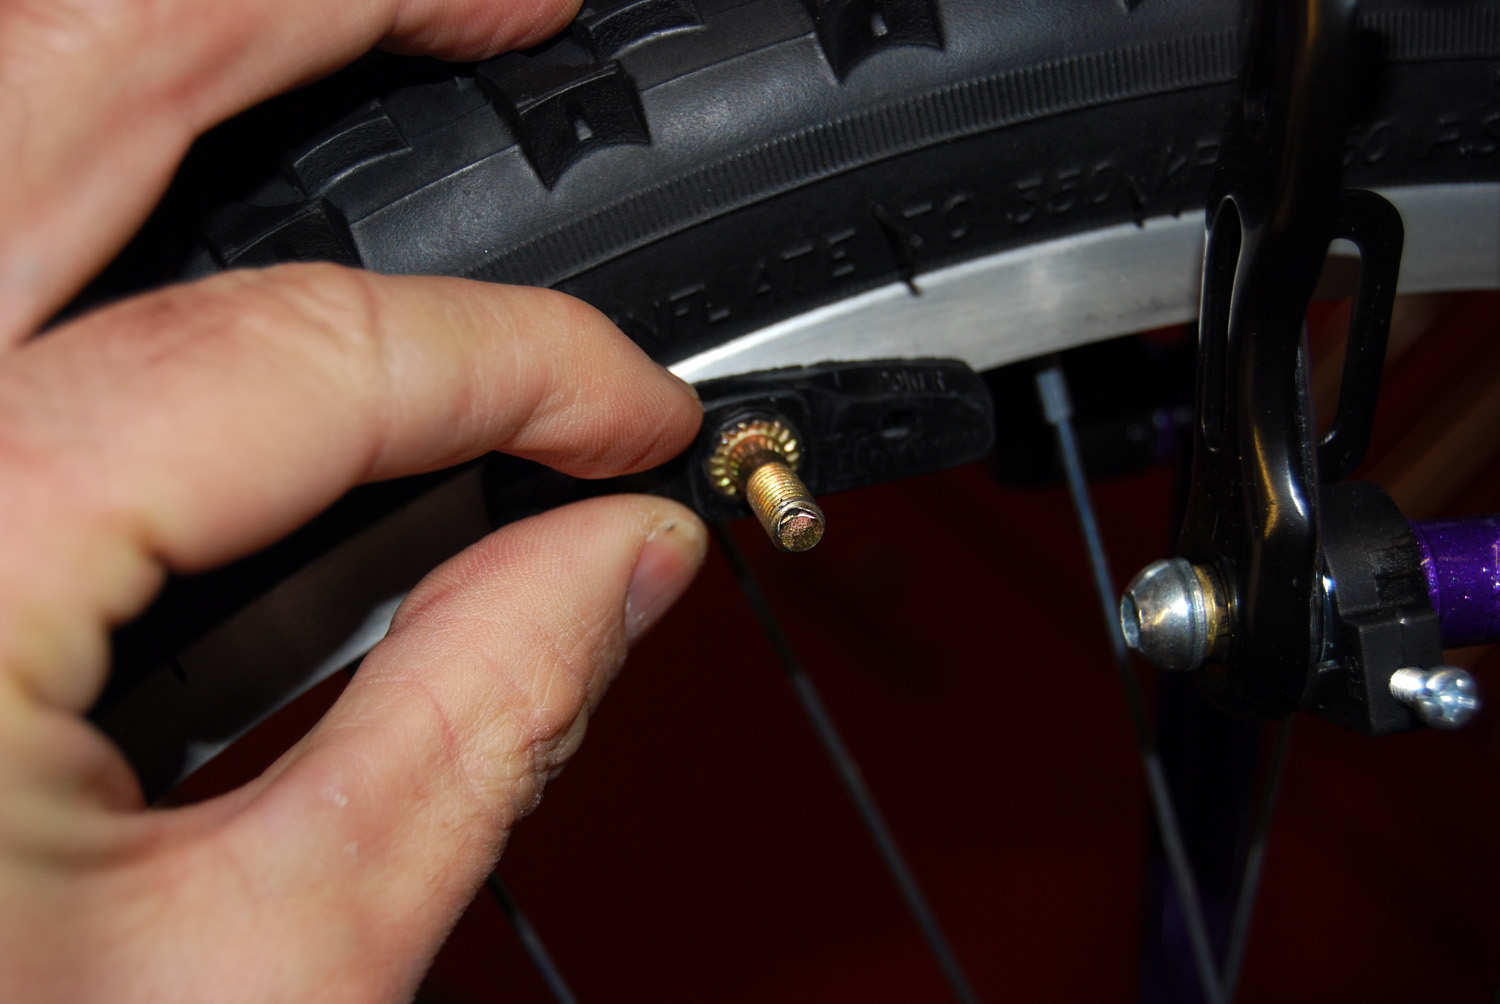
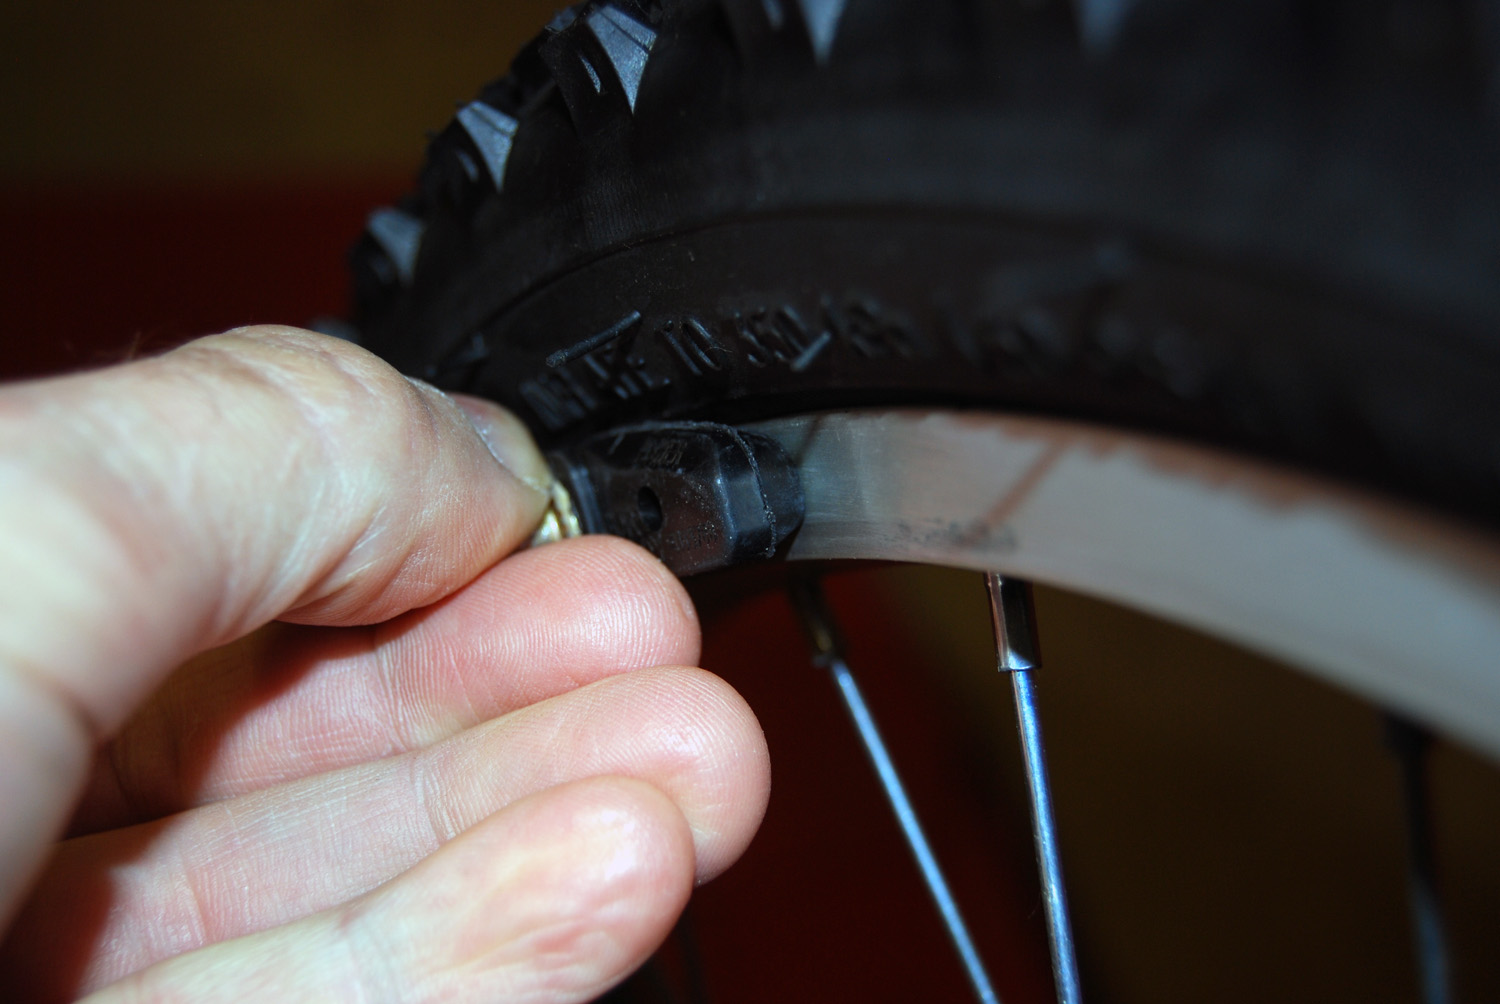
Demonstrating Vertical Pad Alignment
1) Vertical Height Alignment: This is how far up and down the brake pad is relative to the top and bottom of the rim brakiing surface. Linear pull brakes move in an arc, so when the brake pad wears, the area where the pad touches on the rim braking surface lowers with the amount of brake pad wear. The ratio of wear and how far the pad drops due to this wear is about 1:1. This means if the brake pad wears 1 mm, than the area where the brake pad touches the rim during braking will be 1 mm lower than it was when the pad was last aligned. Since the area where the pad touches on the rim drops over time, you want adjust the vertical height of the brake pad as close to the top edge of the rim as possible without overlapping the rim, and without rubbing against the tire.
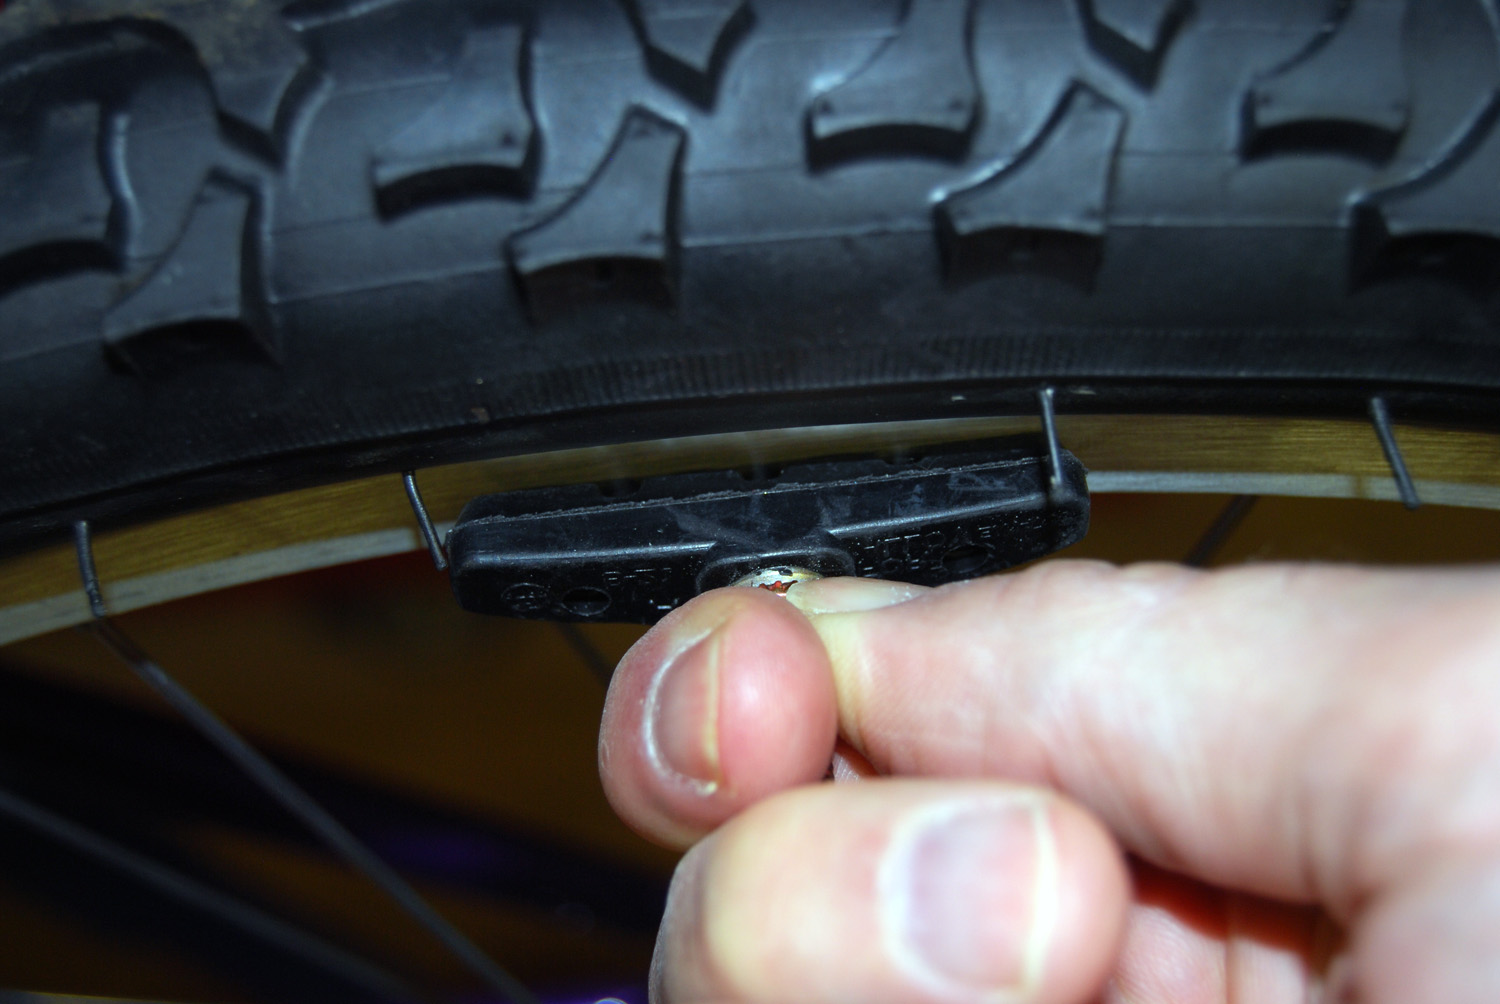
Demonstrating Tangential Pad Alignment
2) Tangential Alignment: This is sometimes called pad tilt. The correct pad tilt alignment is when the front and rear of the brake pad is equal distance from the outer edge of the rim when viewing the brake pad from the side.
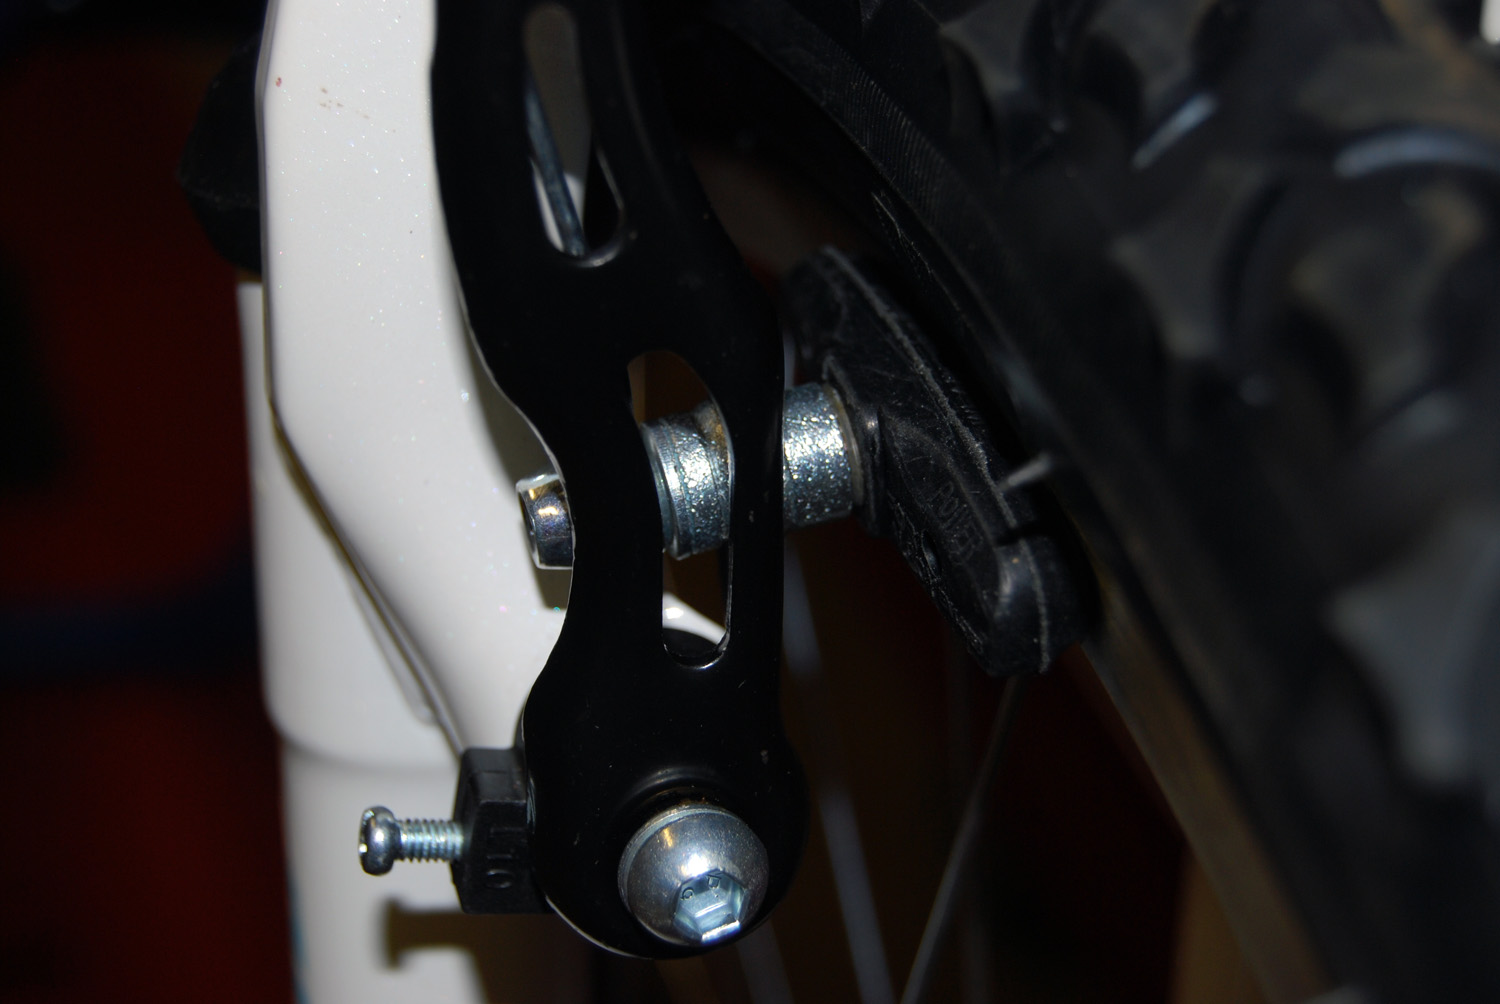
Demonstrating Vertical Face Alignment
3) Vertical Face Alignment: This is when the flat brake pad surface meant to come into contact with the flat rim braking surface is lying flat against rim when the pad and rim come into contact. Or the braking surface of the brake pad is parallel with the braking surface of the rim.
Demonstrating Pad Toe Alignment
4) Pad Toe Alignment. This is when the forward part of the brake pad comes into contact with the rim before the rear. The benefits of pad toe alignment is it stops brake noise, but it does increase pad wear. Toe alignment is optional. Most mechanics can do this alignment by sight alone, but you can place items of known thicknesses behind the rear part of the brake pad to give it proper toe alignment. One item is stick-it notes, which are approximately .09 mm thick, so 5 stick-notes are approximately .5 mm thick. To give a brake pad proper toe alignment, adjust the rear part of the brake pad .25mm to 1mm away from the rim when the forward part of the pad first touches the rim.
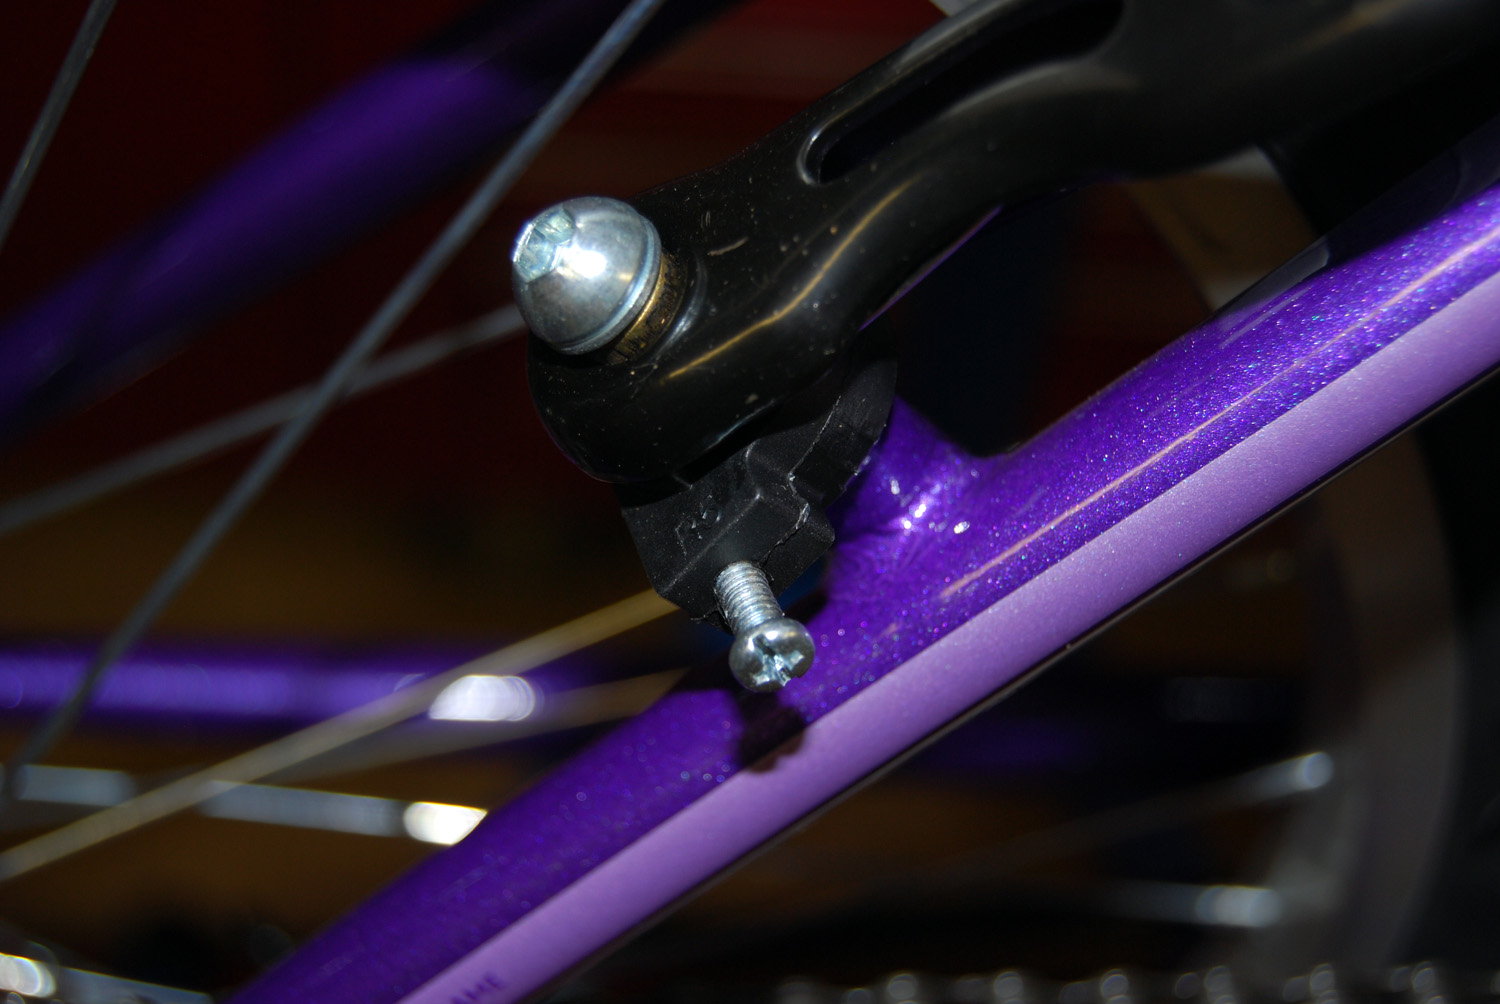
Caliper Spring Adjustment Screw
Each caliper arm is spring loaded with an adjustment screw located on the arm near the arms pivot point. Tightening the screw will apply more spring tension to the caliper arm, and loosening the screw will relieve tension. By adjusting these screws you can position the caliper arms so that the tire and rim are centered in between the calipers. There are two ways to do this. One is to adjust the screws in small increments of 1/2 turn until you can visually see that the distance between each brake pad and rim are equal. This can be hard to do on a mountain bike when the tire is installed. The other method is to adjust the screws in small increments of 1/2 turn until the calipers begin to move at the same time, same rate, and stop at the same time when the brake lever is pulled. When the start, rate and stop times are equal for both caliper arms, than the tire and rim are centered in between the calipers.
The next and last adjustment is to adjust the gap between the brake pads and rim (I start by turning the brake cable adjustment barrel all the way in, than turn it out 2 turns). There are 2 ways to do this. The first method is more precise and requires adjusting a 1.5 mm air gap between each brake pad and rim. The gap is adjusted by lengthening or shortening the brake cable using the cable pinch bolt or adjustment barrel near the brake lever, and the air gap is set to 1.5 mm using a feeler gauge. The brake cable pinch bolt should be used to make big changes in cable length, and the adjust barrel should only be used for small changes. If you have to turn the adjustment barrel more than 2 turns, than turn it back to its original position and make the adjustment down at the pinch bolt. The other method of setting the gap between the brake pad and rim is to make the cable length adjustments until the rider is happy with the amount of tension felt at the brake lever. This method doesn’t require a feeler gauge and depends on rider input.
John 3:16 “For God so loved the world that he gave his one and only Son, that whoever believes in him shall not perish but have eternal life.“
Concave and Convex Washers On Brake Pads